

How to Install Kevlar Skid Plates on Your Canoe
The ends of your canoe take the most abuse.
Maybe you occasionally slide onto a rocky shoreline. Maybe your favourite campsite has a gravel beach. Or maybe a well-meaning friend borrowed your canoe and returned it with a few new "character marks."
If you want to protect the bow and stern from wear, Kevlar skid plates are a great investment. They help extend the life of your canoe and can save you from more expensive repairs later on.
Installing them isn't difficult if you take your time and follow the steps carefully.
Note: These instructions are for Royalex, T-Formex and composite (fiberglass, kevlar) canoes. Polyethylene canoes require different materials because standard epoxy won't bond properly to the hull. If you have a polyethylene canoe, give us a call or stop by the shop and we'll help you out.
One thing to keep in mind: a pair of skid plates typically adds about 5 pounds to your canoe. For most paddlers, the added durability is well worth the small increase in weight.
What You'll Need
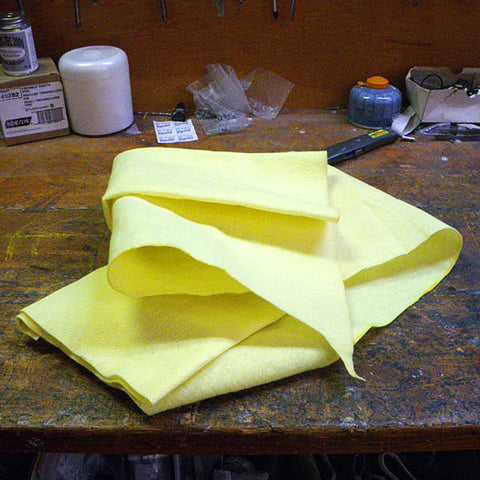
- Kevlar felt (cut to shape)
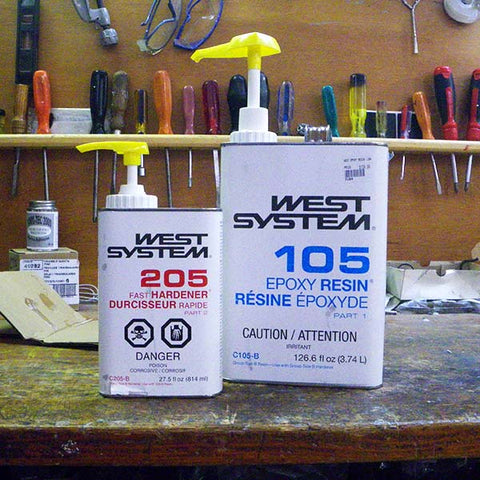
- Marine grade epoxy resin and hardener (we recommend West System)
- Methyl hydrate or acetone
- Disposable mixing container (plastic, metal, or wax-free paper)
- Stir stick
- Disposable brush
- Masking tape
- 80-grit sandpaper
- Latex or nitrile gloves
- Paper towel (or shop towel)
Work in a well-ventilated area. An open garage or outside on a calm day works well. Also be aware of the temperature - epoxy will "kick" (start to harden) faster in warmer weather. Choose the type of hardener for the temperature you will be working in.

Step 1: Prepare the Kevlar Felt
Cut your felt in the shape you want.
Measure approximately 9–10 inches up from the tip of the canoe and make a small mark.
Position the Kevlar felt so it follows the curve of the stem. If you notice any puckering, trim small relief cuts so it lays flat.
Once you're happy with the fit, tape it temporarily in place. It can also help to lightly trace around the felt with a wax crayon so you know exactly where it will sit.
Step 2: Prepare the Surface
A good bond starts with a clean surface.
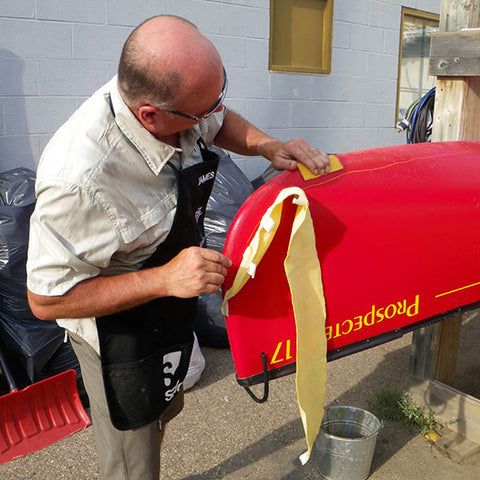
Wipe the area with methyl hydrate or acetone, then immediately wipe it dry with paper towel before the solvent evaporates. Allow the surface to dry completely. (You can speed this process up with a blow drier or heat gun if you wish.)
Next, sand the entire area where the skid plate will be installed using 80-grit sandpaper. The goal is to create a rough surface that gives the epoxy something to grip.
Remove all sanding dust before moving on.
Step 3: Mask the Area
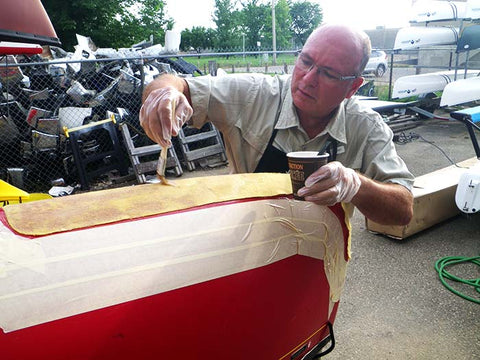
Use masking tape to mask around the outline of the skid plate, leaving roughly a 1/8-inch gap between the tape and the edge of the felt.
This helps create a clean, professional-looking finish while still allowing the epoxy to bond properly to the canoe.

Step 4: Mix the Epoxy
We recommend West System epoxy because it's marine-grade, durable, and easy to work with. This is what we use in our shop.
Carefully follow the manufacturer's mixing ratio. Most curing problems happen because the resin and hardener weren't measured accurately. We like the West System pumps as they dispense the correct amount of product and are clean to use.
Dispense the resin and hardener into a container that cannot melt - the chemical reaction that turns the epoxy from a liquid to a solid state creates a large amount of heat. It melts through styrofoam and can burn your hands so be careful!
Mix the epoxy thoroughly before applying.
Step 5: Apply the Skid Plate
Brush a thin coat of epoxy onto the prepared surface.
Place the Kevlar felt onto the wet epoxy, making sure it's centered and straight.
Using your brush, work more epoxy into the felt until it is completely wetted out (saturated). Look carefully for trapped air bubbles and work them out as you go. A gloved hand works well for gently smoothing the surface.
If you're working in warm weather or using a fast hardener, don't take too long—epoxy can "kick" (begin curing) fairly quickly.
Step 6: Clean Up
If you spill a large amount of resin, soak it up with sand or clay. Avoid using combustible materials like sawdust, as curing epoxy generates heat.
Allow any leftover epoxy in your mixing container to cure completely before disposing of it. Never throw away uncured epoxy - this is a fire hazard.
Step 7: Let It Cure
Allow the canoe to sit for at least 24 hours so the epoxy fully cures.
You can take the tape off as soon as the epoxy is tacky. If necessary, you may sand the skid plate gently with a medium grit sandpaper after it has hardened.
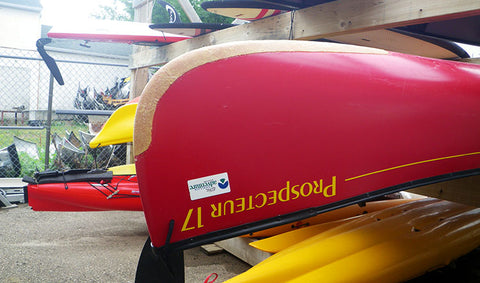
You're Ready to Paddle
Your canoe is now better protected against the scrapes and abrasion that naturally come with years of paddling.
If you'd rather leave the installation to someone else, we're happy to do it here at Eb's - we install skid plates regularly. We can also help you choose the right materials if you'd like to tackle the project yourself.
Good luck and happy paddling!
Comments
Leave a comment