The first thing to do is clean your skis - decks and bases. This applies to classic and skate skis but is most necessary for waxable classic skis. There are two kinds of solvent cleaners: grip wax (base) cleaner and glide zone cleaner. Be sure to use the right kind in the right area!
If you have waxable skis, scrape all the grip wax you can off the bases with a scraper or (carefully) with a putty knife. Finish with base cleaner by rubbing the grip zone (middle third) of your bases with a lint-free cloth (like Swix Fiberlene) until there are no sticky patches. Use a little more on a fresh piece of cloth and rub the sidewalls and top decks too. If you have skin or fishscale skis, you don't need to do this step.
For your glide zones, don't panic if you don't have glide zone cleaner. Brush the gliding parts of your bases (full base for skate ski, tips and tails for classic skis) with a brass or nylon brush. Brush in a tip to tail direction without too much pressure and after about 8 passes or so wipe clean with a lint-free cloth.
The next step is to apply wax to the glide sections of your ski. This seals the base to protect it from contamination while being stored. The most thorough method is to iron in a base prep wax (or a warm wax such as yellow or universal), however if you only have liquid glide this will offer some protection.
If ironing, apply your wax as you usually would but do not scrape the base. Make sure to leave the grip zone bare on a waxable classic ski; you don't want glide wax there. It's the glide zones you are most worried about protecting. For more information on hot waxing click here.
If applying liquid glide wax put about 3 applications on, allowing a full dry between each. Don't brush between applications. For more information on how to apply liquid glide wax click here.
Last you need a safe place to store your skis. Pairs should be base to base with straps or sleeves. Make sure to loosen the straps so the camber is not compressed all season. Store them in an area that doesn't experience large temperature fluctuations if you can; inside your house is perfect. Keep the skis away from heat and dust - you may put them in a ski bag if you wish.
Skis can be stored either vertically or horizontally in an area where they won't get bumped or have other items placed on top of them.
If you follow these steps your skis will be fresh and ready to go next season. When you're ready to ski, scrape off the storage wax (if ironed in) and brush the bases with a copper or stiff nylon brush. They are now ready to be glide waxed as you normally would with a fresh coat.
]]>Unfortunately it's nearly impossible to predict whether roof racks will make excessive noise on your vehicle or not. A rack can be quiet on one model of vehicle and whistle like crazy on another. It all depends on air flow.
Very simply, how air flows around your vehicle and cross bars is what determines the noise created by your racks. You need to change the way the air is traveling over your racks in order to minimize the sound.
Square and round cross bars will usually cause more noise than aerodynamic ones but all types can cause noise issues on certain vehicles. Aerodynamic bars such as the Thule WingBar are shaped in cross section like an airplane's wing, creating a shape that air can flow over more easily. They often have wind diffuser strips on the top that further deflect the air flow so you don't get that annoying hum.
These bars cost more than basic square or round bars but you've got a better chance of a quiet ride. For more information on roof racks and how to choose what you need, see our blog post on Buying a Roof Rack.
If your rack is already causing a racket, an easy fix is to buy a fairing - a wind deflector that attaches to your front cross bar. This almost always fixes the problem.
If you're into a more "do-it-yourself" kind of a look you can try taping sections of pool noodle to your bars. This can reduce the noise for a lot less than a fairing costs, but adds some drag to your rack. You can also purchase pads that are designed to go around your cross bars; these are useful for protecting paddle boards or other flat loads you're carrying.
Our favourite quick fix however is to wrap bungee cord tightly around your bars in a spiral fashion. Use about four feet or so of bungee and wrap so there is about 2-3 inches of space between "wraps". This almost always makes a huge difference in noise reduction and can save your sanity on that next trip!
]]>If you are considering buying a new or used boat, or simply choosing which boat to paddle out of a fleet, look at these 3 characteristics and you'll be able to make a sophisticated choice.
The top-down view of a boat shows the ratio of length to width. Generally speaking, long narrow boats will be faster and less stable. Shorter, fatter boats are more suited to recreational use and will be slower but more stable.
Canoes that are wider at the front will tend to ride waves more buoyantly, and if the hull is flared here this will also deflect waves better. Canoes that are more narrow at the front will tend to cut through waves, which is faster and more efficient but can get you pretty wet if you're in big water.
Look at the profile of the boat. If it was sitting on the floor, how much of the hull would be contacting the floor? The entire length (little rocker), or only the middle part (large rocker)?
A boat with little rocker will track straighter, meaning you don't have to work as hard to make it go in a straight line, but will be more difficult to turn. A boat with more rocker will maneuver more easily but will not hold a straight line as well.
The profile also shows you how deep a boat is. The more boat there is sticking up out of the water the bigger the capacity and the more protected paddlers are from the water, but the more there is to catch the wind.
Say you cut the boat in half across the middle width: what does that shape look like? If it has a flat bottom, you've got a stable but slow boat. Round bottoms will feel quite dynamic and will be significantly faster (read: less work to paddle). A slight V is a mix of stability and speed and generally tracks well. A boat with flat sections and sharp angles (hard chines) will have decent speed and tracking, and once you learn the feel will be stable when leaned onto one of the flat sections of the hull.
When in waves, a rounder-bottomed boat will keep your body more upright than a flat-bottomed boat (which wants to stay flat on the surface of the water).
There are definitely other things to consider when looking at boats, such as materials (affects weight and durability), comfort (such as seats, foot space), extra features (rudders, skegs, hatches, footbraces, rigging) and how easily you will be able to transport it to your paddling location (car-topping).
Understanding the 3 views above however gives you the ability to pick out a boat that will paddle the way you want it to, which is fundamental.
]]>If you want your child to love cross country skiing, get them good equipment that fits properly. They will experience success on the snow and hopefully get hooked on skiing!
Here at Eb's we make sure each child is properly sized when getting new equipment, but it helps if parents understand a bit about sizing gear. You may be looking at getting used skis or trying to determine if last year's stuff will still fit.
Most little ones start out with skis that strap on to their winter boots. Make sure the skis aren't much longer than the child's height, and that the bindings strap on securely. Unless you are already waxing other family member's skis, we recommend waxless skis for the first few years. Kids normally shuffle at this stage and waxless skis will give them grip even in poor conditions.
It is widely recommended not to introduce poles until the child has learned how to propel themselves through the kick; however if it becomes a make-or-break situation just give them poles and let them have fun.
Don't get hung up on the old "tip-to-wrist" method for measuring ski length. Some ski manufacturers make stiff skis (eg. Salomon), some soft (eg. Fischer). The correct ski length could be as short as the height of the child or it might be 20cm taller. The primary determining factor for ski length is the skier's weight.
The essential thing is that the child is able to compress the ski with one foot. If they cannot, it will be impossible for them to get grip on the snow. The best way to test this is on our camber tester at the store, but you can do the "paper test" at home. Clean the skis, have the child stand on them on the floor, and see how easily a piece of paper slides underneath the bases. This is called the Paper Test and gives you an idea of how the skis will actually perform on the snow.
If your child is in the Jackrabbits program, they will be introduced to skate skiing in Level 3. It's best to have a waxable ski at this stage: wax them for classic lessons and strip the wax off for skate lessons. Ski boots can be regular or combi style as both have a soft enough flex for classic skiing.
At some point you may decide your child is ready for skate specific equipment, perhaps if they really enjoy skate skiing or have started racing. When sizing skate skis it is important that the child cannot fully compress the ski when standing on one foot, as the ski acts like a spring. If the child can easily compress the ski it will be very difficult to control during the kick phase because all the weight will be on the middle of the ski during the push off. With more weight carried on the tip and tail of the ski it retains its tracking during the push. Usually a skate ski will be about same height as the child or a few cm's taller.
Skate boots for children have greater ankle support and a stiffer flex. Skate skis and skate boots should not be used for classic skiing, but classic equipment can be used for skating.
Most children move to a ski boot/binding system around age 4 or 5. This gives them a lot better control as long as the boots fit properly. Don't go too big, hoping the child will grow into them - the boots may flex at the wrong place for the child's foot and cause blisters and pain. Not to mention making it difficult to control the ski properly.
Start with a classic junior boot with lots of flex in the sole. If your child starts skate skiing more you may want a combi boot; these have a flexible sole for classic but give a lot more ankle support for skate skiing.
To check size, here's a trick: before the boot is laced up have the child kick her toe on the floor so the foot shifts all the way forward in the boot. You should be able to slip two fingers behind the child's heel. Another method is to remove the insole and have the child stand on it; this gives you a visual of how the foot will fit inside the boot.
NOTE: it is essential to check that the boots will fit the bindings on the skis. The current universal system is commonly known as the NNN system. The binding will have two ridges running down its length to fit into two parallel grooves in the sole of the boot. If you are buying used equipment be aware that there are other/older binding styles out there; ensure you are buying boots and bindings that match (eg SNS Pilot boots with SNS Pilot binding). If in doubt, give us a shout!
It is important that pole height falls somewhere in the acceptable range because it greatly affects how a child skis. Poles that are too short or too long will not only be inefficient, they will affect the child's skiing rhythm making it difficult to ski with proper technique.
Measure pole height to where the strap comes out of the grip, and have the child wear their ski boots. For classic skiing the poles should come to a height between armpit and shoulder. Skate poles should come somewhere between chin and nose.
If your child is just starting to skate ski you may want a pair of telescoping poles that has about 20cm of height adjustability. This way you can get away with one pair of poles while still allowing your child to learn how to ski properly.
--------
Note: Eb's takes trade-ins on kids' equipment when you buy new, as long as they are in decent shape and the current binding system. This helps when you need to upgrade your children's gear!
]]>
Fuel, for most of us, is in the essential category. Being relatively heavy however it is desirable to bring only what you'll need. How do you calculate how much fuel you will require?
There are a number of factors that affect fuel use. We'll talk about some of the more important ones to consider and how to calculate what you'll need. For those who want a fast answer jump to the bottom of this post for some rough guidelines, and check out our quick tips.
You need to know how many people are coming on the trip and how long the trip is so you can get an idea of how many litres of water you will be boiling. This would include meals and hot drinks. A general rule of thumb is 1L of water per person per meal. If actually cooking you can use the same formula as the stove burn time would be roughly the same.
You also need to know something about your stove - this may be boil time (how long it takes to boil a litre of water) and/or burn time (how many minutes it takes to burn a set amount of fuel). You can look these up under your stove specs (on your packaging or the manufacturer's website).
If you don't mind doing some homework you can get a fairly precise estimate on the fuel you will need by calculating water needed for each meal rather than the basic 1L/person rule. These calculations work for both canister and liquid fuel.
For example a 3 day trip for 2 people using an MSR WindPro II canister stove could be calculated like this:
Therefore an 8oz (227g) canister would be more than enough for 2 people going on a 3 day trip based on the above criteria, but a 4oz (110g) canister wouldn't be enough. We figure it's best to err on the side of too much.
*Note: you will find discrepancies with many published specs. We know we have! If things don't compute quite right go with the most conservative guess so you don't end up eating a cold meal or missing your cup of coffee.
We based the following guidelines on MSR's liquid fuel bottles and canister sizes. The time spans are a rough estimate based on 1L/person/meal for 2 hot meals a day in ideal conditions.
How do you tell how much fuel is left in a canister? Fill a pot with water and float the canister in it right side up (tilt the canister to release any air bubbles underneath). The more fuel there is in the canister the deeper in the water it will sit. MSR IsoPro canisters have a basic float diagram on the side for reference.
]]>
Most people paddle close to the same speed that they walk. A ballpark figure is about 4-5 kilometers per hour (kph) for someone with some paddling experience. Factor in your skill level, fitness, boat type and the number of breaks you think you'll take to come up with a base paddling speed. For example if you are a beginner in a wide, flat recreational kayak you may be closer to 3 kph. If you are a fit person paddling a sleek tandem canoe with a partner you might be 6 kph.
The South Saskatchewan River that runs through Saskatoon will travel approximately 2 kph at 100 cubic metres per second (cms). Add this speed to your base paddling speed if you are going with the current, subtract it if you are going against it.
This speed will vary a lot depending on how wide and deep the river is where you are paddling and what the current flow level is. A river will generally flow more slowly near shore and in wide sections, and more quickly in deeper and narrower areas. You can check the current flow of the South Saskatchewan on the Water Security Agency's web page.
Any decent weather report will give you wind direction and speed. Wind speeds of 10 kph or less won't affect you too much unless you are in an inflatable dinosaur; winds of 20 kph and up will affect your speed significantly. The Beaufort Wind Scale is a great reference for estimating wind effect. Remember to look at wind direction too - if you are able to paddle along a protected shore (or not) this will make a big difference in your speed.
Google's map measurement tool is great for calculating travel distance. Open Maps and right click to get the drop down that includes the tool, then simply click points along the path you will take.
Then with some simple math you've got your estimation. Here's an example. You calculated your base paddling speed (with water breaks!) at 4 kph. You plan to paddle from Fred Heal Canoe Launch in to Saskatoon, which is 18 km. The river is running at 100 cms so you add 2 kph on to your base speed to get 6 kph travelling speed. This would give you a paddling time of 3 hours but because you have a 15 kph wind from the NW you give yourself 3.5 hours.
This will get more accurate after you've done this a few times and get more of a feel for how fast you really paddle. Good luck and have fun out there folks :)
]]>Most importantly, think of how you want to use your canoe. If you expect to be hitting rocks or dragging the boat up on gravel shores then overall durability may be your primary concern. If you want a boat that is efficient to paddle, or need something lighter to get on your vehicle or over the portage, you'll be looking at a strength-to-weight ratio that suits your needs better.
There are a lot of factors that determine how durable a canoe will be. It is commonly thought that aluminum and Royalex-type plastic laminate boats are the toughest but there are pros and cons to each hull material and layup. We explore some of the common ones below.
Aluminum canoes were the first new thing after wood and wood/canvas canoes. Affordable and practically indestructible they became the go-to for rental and school programs, wilderness trippers and families. Many of us remember the old Grumman canoes: noisy, cold (or burning hot) and crushingly heavy. Aluminum is no longer sought after although due to their longevity you still see fleets of them around. If you manage to rip one you can weld it together but the dents and scars won't disappear.
Pros of aluminum hulls: can last indefinitely, not affected by UV, take a lot of abuse
Cons of aluminum hulls: cold (or hot), heavy, noisy, not nice lines, sticks to rocks, will dent and not go back into shape
There are two main families of plastic canoes: polyethylene, and what's commonly known as Royalex. Royalex was a popular canoe building material that is no longer available; however T-Formex has replaced Royalex and is almost the same material.
Polyethylene (PE) canoes have a wide range of properties depending on what type of PE is used and how it is constructed. Generally considered the toughest material out there, PE canoes are usually very durable, overall quite heavy, and are UV sensitive to degredation. The low priced canoes you find in big box stores are often made of thermoformed PE or single layer PE. These boats, while tough, will fade, lose their shape, and have a short lifespan. Because the material is so soft these canoes need additional stiffening; often these canoes have a metal rod running down the keel line which adds even more weight to an already heavy boat.
Densities of PE includes linear low density (LLDPE), medium density (MDPE) and high density (HDPE). LLDPE is the least expensive to manufacture and is made by pouring plastic powder or pellets into a mold and then heating and rotating it. The result is an inexpensive, extremely heavy plastic boat with excellent impact resistance. HDPE canoes are the lightest and stiffest boats (easier and more efficient to paddle) with almost the same level of durability as LLDPE.
The number of material layers (and thickness) is another important factor. A single layer boat made of a thick layer of PE will be the most sturdy and the softest. Often whitewater kayaks are made in this way as they absorb impact very well. This softness however makes them slower and less efficient to paddle. Three layer PE canoes are made of a material with PE outer layers and a closed cell foam layer sandwiched in the middle. This construction generally results in a stiffer, lighter boat with good durability and the added bonus of inherent flotation.
T-Formex boats are made of laminate sheets. The sheets have outside layers and a closed-cell foam inside layer that adds buoyancy and stiffness to the boat. T-Formex has the durable properties of plastics but makes a lighter boat than aluminum or poly. They are extremely popular for wilderness tripping, whitewater and recreation.
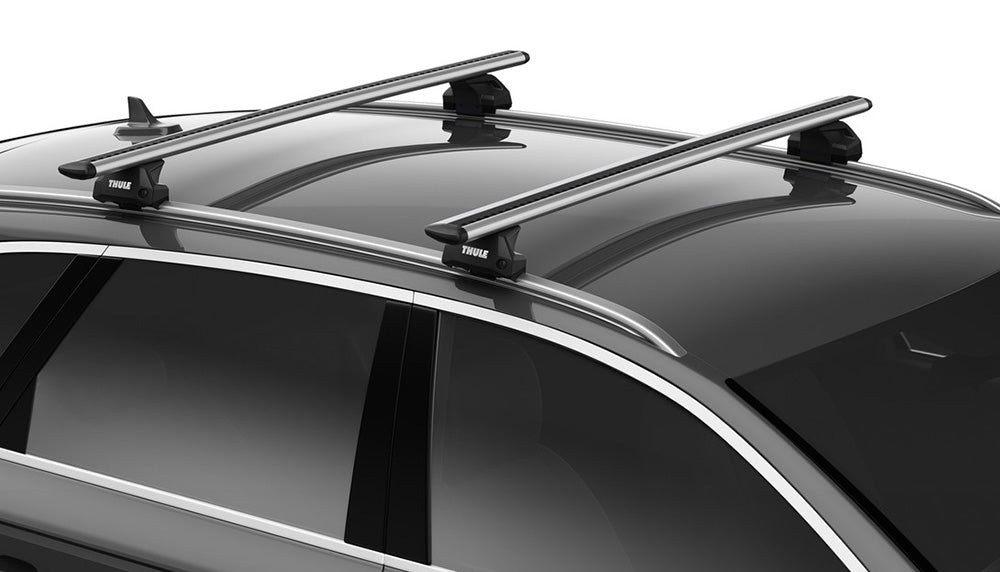
Unlike aluminum boats that stick to rocks, plastic boats will slide over them. They also "bounce" off rocks (depending on how you hit them). They are more susceptible to UV degredation however so it's best to store them out of the sun. If plastic boats heat up in the sun they grow softer and can deform; we've seen boats with grooves in them made by the straps holding them on to a roof rack. Generally if you warm them up again they will go back into their original shape. This inherent softness of the material can also cause these boats to "oil can", an annoying flexing of the hull as you paddle.
PE boats are difficult to repair as almost nothing sticks to the material. T-Formex is more forgiving as far as repairs go, but is not as straightforward as repairing a composite boat.
Pros of plastic hulls: very durable, slides over rocks
Cons of plastic hulls: abrades over time (hull becomes "fuzzy" which slows the boat down), heavy, blunt exit and entry lines, less stiff, can be more difficult to repair
This is a huge family of canoes and includes any that are made with a cloth and resin layup. The cloth can be fiberglass, aramid (kevlar), graphite, or combinations of weaves. The type of resin used has a huge impact on how durable and long-lasting the canoe will be.
These canoes are typically built by layering the cloth in a mold, applying resin and then vacuum bagging to extract the most amount of resin, resulting in stiff light boats. This construction method allows for sharp entry and exit lines and the best ability to create performance hull shapes.
Flotation is often added in the form of float tanks. The hulls are stiffened in a variety of ways including foam cores, ribs, or multiple layers of fabric. Generally the strongest boats will be made of lots of layers of fabric and they'll be the heaviest. Boats with ribs will be lighter but the ribs create non-flex points that concentrate stress upon impact. Foam cores will disperse impact force better.
Cloth properties vary. Fiberglass is the most affordable and can be extremely strong with a mulit-layer layup. Aramid, a cloth used in the aerospace industry and in manufacturing bulletproof body armour, will give you a lighter, stiffer boat but it will be more expensive as the fabric is more difficult to work with. Carbon cloth makes the stiffest, lightest hulls that can be almost as strong as kevlar. Carbon boats (also known as graphite) are often made with kevlar layers.
Resins are typically polyester, vinylester, or epoxy. When buying a canoe make sure you ask what type of resin the hull is made of as it directly relates to the durability and lifespan of the boat.
Polyester resin is the least expensive and creates a brittle boat; it is commonly used for inexpensive fiberglass canoes. There are higher quality polyester resins (such as isophthalic resin) that are more UV and chemical resistant, thermally stable, and have higher tensile strength.
Vinylester is considered a combination of polyester and epoxy resins. It flexes better than polyester, has a longer lifespan and resistance properties, and is a good compromise of strength and price.
Epoxy resin is the most expensive and the highest quality resin you can get, resulting in the strongest hulls. It is more difficult and slower to work with and requires heat to cure, so many boat builders shy away from this. Boats built with epoxy resin have the highest strength-to-weight ratio.
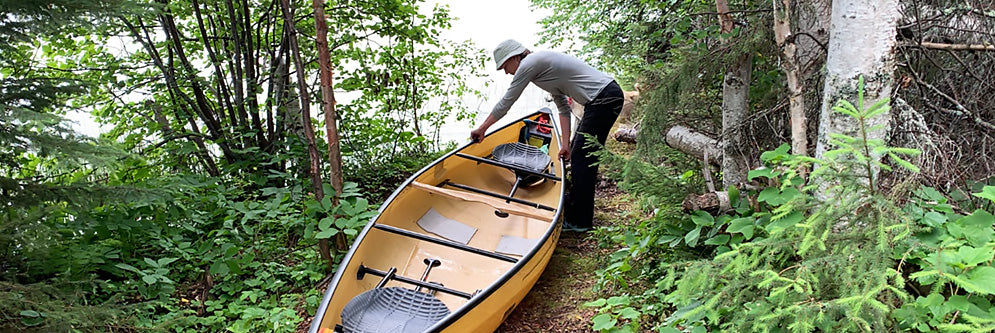
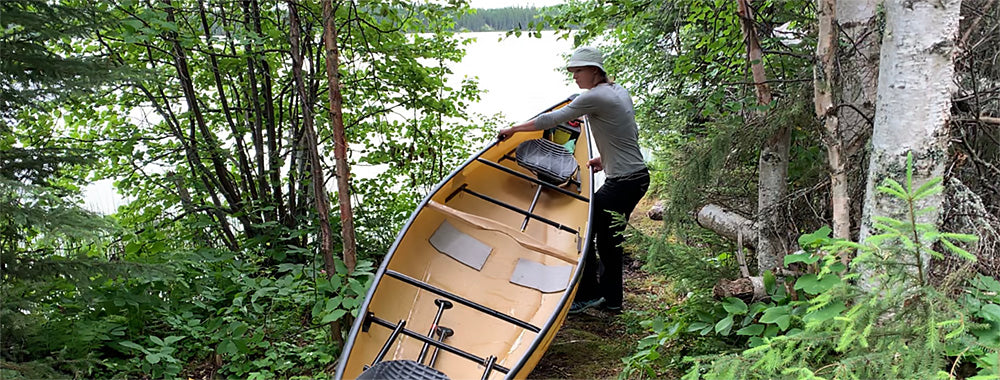
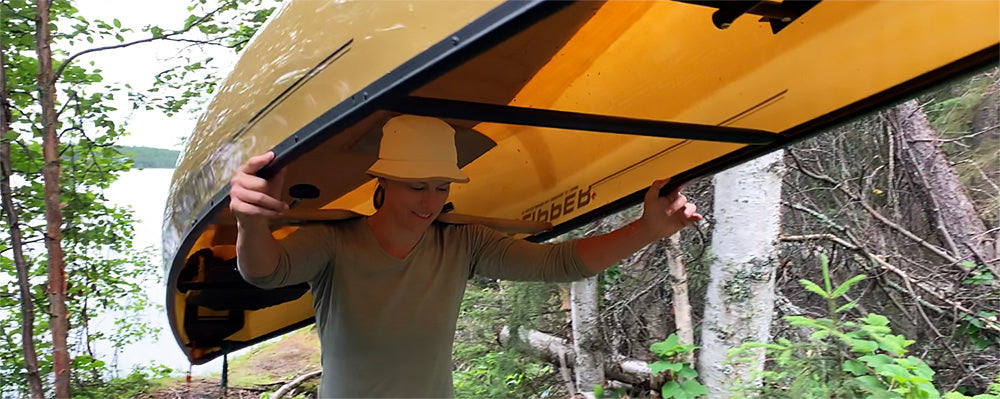
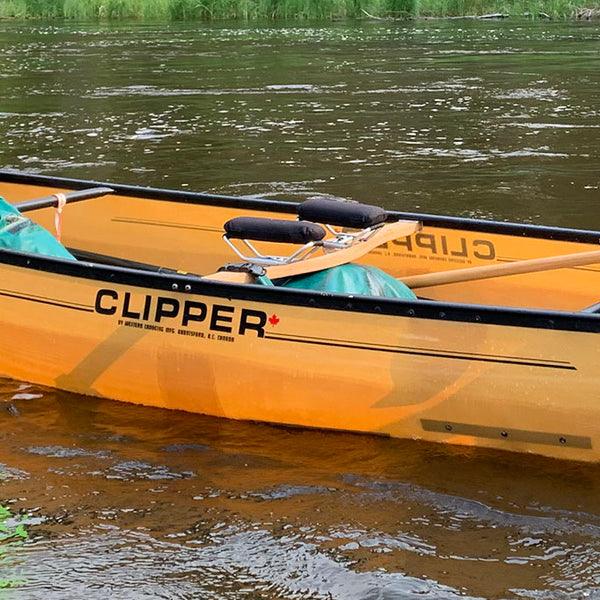
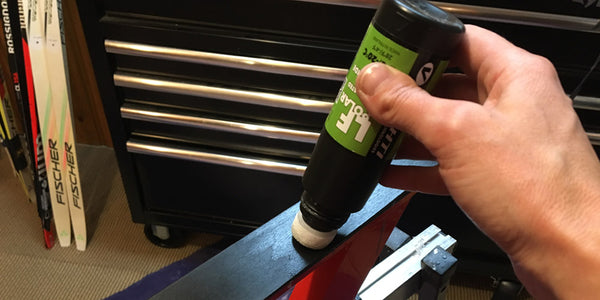
Layups affect the durability of the canoe. The canoe you see below is an ultralight layup. This means there is no gel coat on the outside of the hull so it is the honey colour of the aramid cloth. Gel coats come in lots of colours and although they add weight to the boat they are the first defense against UV and scratches. Ultralight boats, because they lack this defense, are often reinforced with outer S-glass layers and epoxy resins for durability. Although you should keep all canoes out of UV exposure as best you can (it is the number one degrader of boats) it is especially important with ultralight models.
It should be noted that there is a lot of variation in durability within a layup type. For example an Ultralight layup (kevlar, no gel coat) can be quite fragile or quite strong depending on how the boat is stiffened, how the material is laid down, and what type of resin is used. We sell Ultralight boats that are a joy to portage but would crush if they hit a rock; we also sell Ultralight boats that can take quite a beating scraping over rocks.
If you are running rivers and rapids and expect some impacts, don't immediately discount a composite canoe. Due to their responsiveness they are easier to steer so you can avoid a lot of potential impacts. Some layups are designed to absorb impact better by allowing the hull to flex slightly. This is done by hanging seats rather than riveting them in (reduces non-flex points) and using multiple layers of fabrics in stress areas, along with more flexible resins. Sometimes other types of fabrics are also used in the layup to add even more resiliency. It has been said that a strong multi-layer composite canoe is as strong as Royalex with a better strength-to-weight ratio.
Pros of composite hulls: best strength-to-weight ratio, easily repaired, efficient hull shapes, responsive and stiff, lots of colour options
Cons of composite hulls: depending on layup can be less durable against sharp impacts than plastic or aluminum
It can be overwhelming comparing building materials and manufacturing processes to come up with the perfect boat for you. First of all, choose a reputable paddle shop so you get the best advice you can. Know what kind of paddling you will be doing and on what kind of water, and be honest about your paddling ability. Have a priority list in mind to help narrow down the possibilities. How important is weight to you? Is your budget limited or can you be flexible about price? Will you be lending your boat to others that may drag it up on the shore? The more you think about these things the better equipped you will be to find your perfect canoe.
]]>This applies to any ski - skate skis, fishscale skis, waxable classic skis, skin skis - as they all have glide zones. Glide zones are the smooth parts of your ski base. This is the entire base of a skate ski or the tips and tails of a classic waxable or skin ski.
Waxing your glide zones is a little like putting oil in the engine of your car. Your skis will last longer and run better. Snow is abrasive and wears your wax off so make sure to apply glide wax to your skis about every 50km or so of skiing. Don't worry about applying it too often; you cannot over-wax your glide zones. It is best to do this at room temperature.
You will need:
Optional:
If you want to keep things simple just get a bottle of liquid glide wax and a brush and use the quick and easy method described below. It will make a big difference over doing nothing to your skis! If you have the time to properly treat your skis, use the full method.
Quick and easy method:
First brush your glide zones with the nylon brush to loosen dirt and contaminants. Shake your bottle of liquid glide wax and rub the dabber applicator along your glide zones until the bases are evenly wet. Let dry completely (at least 15 minutes) and then brush the glide zones with a nylon brush until the bases are shiny. Brush in a tip-to-tail direction.
Full method:
For the most complete glide zone treatment, brush the glide zones and then clean with a glide zone cleaner. This is an important step. Squirt the liquid cleaner (glide cleaner, NOT regular wax remover!) onto the glide zones, let sit a few minutes, then rub dry with a lint-free cloth. This removes dirt and contaminants that would degrade your ski base and the wax job you are about to apply.
Once your clean bases are fully dry, apply a base wax. This creates a dirt-resistant coating which results in a longer lasting wax job. Shake the bottle, rub the liquid evenly onto your glide zones, and let dry completely (at least 15 minutes), then brush until the base is shiny.
Finally, apply the liquid glide wax. Shake well, rub the liquid evenly onto the glide zones, let dry, then rub a clean natural cork on the glide zones. The frictional heat helps the wax job last longer. Finally, polish with the nylon brush running it tip-to-tail over the glide zones until they are shiny. This gets wax out of the fine structure in your ski base and maximizes your glide.
Note: if you have fish scale waxless skis you can wax and brush the full length of the ski base, right over the scale pattern. Just make sure you don't rub a cork over the scale pattern.
Your skin is ready to ski on. There are only two products you may need for the skins themselves:
Your skins should last many seasons. You'll know it's time to replace them when you start struggling to get grip.
]]>This applies to all types of cross country skis: waxable, waxless (fishscale), skin, classic, skate, backcountry - because all cross country skis have glide zones. The glide zones are the smooth sections of your ski (except for the middle third of the ski if you have a waxable ski).
Glide wax, whether applied with a hot iron or in liquid form, protects and hydrates your ski bases. Think of it like lotion on dry skin. You can do this at home or take your skis in to a shop to get it done professionally.
1. When you first buy them new skis don't have wax in the bases so the more applications of glide wax the better. They should be waxed and or hot boxed right off the bat before you use them. Higher end skis have bases that can absorb more wax so should be glide waxed as often as you can the first year.
2. At the beginning of each season you should do a wax job. It's best to do this just before the snow season so the wax is fresh when you start skiing. If you do them too far in advance the wax gets "old". Your bases may start to turn greyish which shows the wax is not fresh.
3. When the bases look dry it's definitely time to wax. This is what dry bases look like:
And below shows an image of a dry ski base next to a freshly waxed base:
4. Every 50km of skiing is a good rough measure for how often you should glide wax during the season. This is snow dependent: dry, abrasive snow (as we have in Saskatchewan) and man-made snow strips wax off more quickly than humid, soft snow. For this type of maintenance wax job, use a glide wax that covers the temperatures and conditions you're likely to be doing most of your skiing in.
5. Right before a race or special event you'll want to put a fresh glide wax into the bases. This one can be more temperature and conditions specific as you should have a pretty good idea of what that's going to look like. Racers often wax their skis on site, leaving it as late as they can so they can nail the right wax.
6. At the end of each season it's a good idea to melt a soft storage wax into your skis and leave them unscraped. This seals the bases against contaminants. Next season scrape off the storage wax and apply your fresh glide wax, and you're ready to go.
Happy skiing!
]]>
So of all the stories that make us drop what we're doing and get out the maps, here's 10 that have stuck in our minds since the first time we came across them.
This memoir of two brothers traveling and living off the land in northern Saskatchewan is one of Kevin's top picks, but it's got a following with the rest of the staff. Pretty much anything by Alex Karras is a great read; we recommend Northern Rover: the Life Story of Olaf Hanson and Face the North Wind as well.
These are great tales of people who made a living in the Saskatchewan north many years ago. They remind us we're not so tough, and give us an appreciation for the land we love to paddle.
Jeff is a HUGE fan of everything Audrey Sutherland. She was a really cool woman and would take off in her kayak on long solo trips - plus she loved food. This book has kayaking, wilderness, maps, recipes, and a kick-in-the-pants philosophy: "go Simple, go Solo, go Now". And she can write.
This National Film Board short from 1962 is about the months-long journey of an old time prospector who is determined to find gold on a remote part of the Nahanni River. He's tried (unsuccessfully) 7 times before and the film documents his 8th epic attempt.
It is astonishing how caught up in this guy's story you get, watching him battle his way up the river lugging barrels of fuel for his boat. Besides the intriguing storyline from a bygone era, the film has excellent photography of the Nahanni Valley and a great musical score. A gem.
Speaking of the Nahanni, Kevin read this book back in 2001 right after he paddled the great river. Reading about a place you've been always ups the fascination factor, but the book is a magnificent adventure story regardless.
Patterson had a true lust for exploration and ditched his Bank of England job in the 1920's to travel some of Canada's wildest rivers, searching for gold as he went. This book is an account of his two trips on the Nahanni River and the time he spent in the region. Yet another story that will make you feel you're living the soft life.
This true story is a great example of how NOT to run a canoe trip!
In 1955 six guys set off from Black Lake, SK to Baker Lake, (NWT at the time) and ran into just about every kind of problem you could imagine (many of which were their own doing).
The author throws in some random philosophical quirks from his life story that don't add much to the plot, but nonetheless we recommend this book for everyone who goes on wilderness paddling trips, and very much so for those who lead them.
This is the harrowing true story of a couple of climbers surviving a near fatal accident. The book (by Joe Simpson) was hard to read because the climbers' egos were front and center. The movie filters enough ego out so you can focus on the narrative. What a ride!
This book chronicles the author's journey by bicycle along the Silk Road. Steph read this book before her bike trip up the Demster Highway, and she re-reads it every summer. It's an adventure story of science, human geography, grinding determination, epic landscapes, and best of all the intelligent and thoughtful exploration of borders, wilderness, and world view.
This amazing Scot traveled extensively in the northern regions of Canada in the mid-1800's and is remembered as one of those explorers who was smart enough to learn from the local peoples. He had incredible stamina and traveled long distances, living off the land. He led numerous explorations, one of which found evidence of the fate of Franklin's expedition. Pretty much anything this guy wrote is worth a read.
Harold Kemp was a great writer - he really brings the fur trade to life. It's like you're actually the one struggling across a portage under a freight canoe. He was another adventurer who respected and adopted the local people's way of life.
For those of us living in Saskatchewan, the stories of his time with his family in Stanley Mission 100 years ago are especially interesting and enriches our understanding of our own backyard.
This is a CRAZY survival story that flew under the literary radar here in North America. The author came across an old legend about four Russian sailors who got shipwrecked on an arctic island and survived with almost nothing for six years. Much of the book chronicles his research and eventual trip to Svalbard where these survivors were stranded after being blown off course in the 1700's. You can practically feel the aching cold and your teeth falling out from scurvy as you read it.
Yes, this is considered a children's book but it is an immersive experience to read. The pages are covered with paintings and small drawings all done by the author. It's a beautiful story that comes round full circle, and in the illustrations on each page you can find Paddle somewhere - sometimes obvious, sometimes as a tiny figure you have to look for.
The story and pictures follows the travels of a little wooden paddler in a canoe from central Ontario through the Great Lakes and into the Atlantic. The paddler is carved by a young Indian boy, who scratches on the bottom of the canoe "I am Paddle to the Sea. Please put me back in the water."
And everyone does.
]]>There are some foods that last longer than others plus some handy processed options that are great for longer trips. Here's our staff's go-to foods that last for two weeks or more on our trips.
Fresh fruits and veggies are full of water. They are heavy, bruise easily, and don't last long before spoiling. After a few days though you really start to miss them!
Dehydrated food is the way to go for light and long lasting. You can buy all kinds of dehydrated fruit, veggies, meats, dairy, entrees, etc. If you can dehydrate at home (in a food dehydrator or an oven) make sure you plan well in advance of your trip because it's time consuming.
We always bring along butter (not margarine) which doesn't need to be refrigerated even when you're at home. Oil, peanut butter, and honey and/or jam are in our food barrels too. Other staples:
Some of the quickest cooking carbs that are really handy:
Year, make and model are easy. Roof type is where it can get tricky, but it's vitally important you get this right or your rack won't fit.
How do you tell what roof type you have?
If your roof is smooth and bare, it's called a naked roof. The picture below shows a roof rack on a vehicle with a naked roof.
Some roofs look like they are naked but they have hidden fixed points. These are small threaded attachment points located near the four corners of the roof or sometimes on rails, and are often hidden under a small flap. The vehicle below shows a fixed point open with an attachment bolt placed in it; it is ready to be mounted with a crossbar assembly.
If your vehicle has rails running front to back along the sides of your roof, you need to know what type of rails these are. If there is space between the rail and the roof, these are called raised rails. The picture below shows a roof rack mounted on raised rails.
If there is no space between the rail and roof, these are flush rails. The picture below shows a roof rack mounted on flush rails.
Be careful; some vehicles with naked roofs will have dark inserts along the sides that look like rails but are not. Rails are raised up so that there is something for the roof rack "foot" to clamp on to. A rack put on a naked roof hooks onto the door jam instead, as there's nothing else for it to grab on to.
Rails can also be confused with tracks, which are long grooved channels that run along the sides of vehicle roof from front to back. The picture below shows a rack mounted on a vehicle with tracks.
Finally, some vehicles come with factory crossbars. These are two bars/slats that run across the vehicle roof from driver's side to passenger side.
Once you understand what roof type you have, we can figure out exactly which rack is going to fit your car.
]]>
Yes, it takes a little longer to boil water than a roaring MSR Whisperlite, but it`s quiet, it`s simple, and it transports you back in time to to the good old days when camping was less complicated.
The company was a Swedish father-and-sons operation that began in 1925 and is still owned and operated by the family. They started manufacturing lightweight aluminum cookware that evolved into the design of their alcohol burner, the central piece of all their cooksets.
This little stove burns methyl hydrate, otherwise known as wood alcohol or fondue fuel. This fuel isn't as flammable as white gas, so is a little safer.
It doesn`t get much simpler than this: set the burner in the stove base, pour the fuel in, light it, and place the windscreen on top. Little tabs in the windscreen fold down to support your pot or kettle. Note that when you first light the fuel you may not see flame; Jeff waves his hand over it to feel if there's heat or not.
When heated the fuel pressurizes and is forced out the little jets on the burner rim, where it burns hotter than you`d think.
Jeff likes how simple the Trangia system is to use. No pumping, no priming, it's got a stable built in base and effective windscreen, and it's almost silent. He can have a nice conversation with someone while waiting for his water to boil.
Tea time!
Darn fogged up glasses....
]]>Here's our staff picks: the things that almost always make it into our packs.
Why does an espresso maker always come on my trips? If you understand espresso, nothing else needs to be said. - Kevin
Canoe trips are not just about hardship and suffering. They should include sublime pleasures such as relaxing in a hammock with a good book or a fishing rod. I have successfully enjoyed my hammock throughout both ski season and paddle season. - Jeff
A simple folding camp chair always comes on my trips. Sitting on stumps is not as comfortable as it used to be! Being able to lean back after a day paddling is a real treat. Not only this, but these chairs double as doormats for your tent, flat surfaces to lay out your lunch or change your kid's diaper on, and pads on the bottom of the canoe for dogs or passengers. They also slide into a pack nicely and provide padding against your back. Love them! - Edith
I really like something to brace against while I'm paddling. I also have had injuries to my back and I like the support while fishing or taking a break. It feels good to be able to lean back a little. - Brennen
I'd have to say I always enjoy bringing a real paperback book - no matter the type of trip. World travel, kayak tripping, car camping, hiking; there's just something about being able to read a few pages while going to bed or laying in a hammock or taking a break in the afternoon. Plus: chocolate. Goes without saying. - Sarah
I like to relax, and this chair is so light and strong and packable it goes everywhere with me. Whether it's having lunch, fishing, cooling my feet in the lake or taking wildlife photographs, this chair is one of my favourite pieces of gear. - Bryan
Once a luxury, now essential! Trekking poles take weight off my legs and save my knees when I'm hiking, especially when carrying weight. They make traveling across loose rock and scree much easier and it's nice to have the extra balance points crossing streams. - Alison
I always bring a frozen platypus bottle or two on any trip where I'm not overly concerned about weight. I started doing this as a packable way to keep fresh food and meat cold, however the luxury comes in day 2-4 of a hot trip when I still have refreshing cold water. - Marcus
Both of these keep you sane! A bug jacket is a must in many places at certain times of the year. And whenever you need a break, sitting down with a jar of Nutella always makes things better. -Steph
A Dutch oven is very versatile. With its even heat distribution, the pot itself is great for simmering chili, soups, stews, and other one-pot meals or for cranking up the heat to make a quick stir-fry. But the biggest advantage a Dutch oven brings is the 'oven' part: put some coals on top of the lid and now you can bake bannock, bread, brownies, cheese biscuits, fruit crisps, pizza, pudding cakes, etc. Then there are all the options for taking simple recipes to the next level: make a pot of chili and bake some cornbread on the top, brown the cheese on top of a breakfast scramble, or add some crunch to the top of a shepherd's pie.
At under 4 lbs for the 10" size, aluminum Dutch ovens weigh only about 1/3 as much as their traditional cast iron cousins. By dehydrating some of your menu items (pasta sauce is a prime target), you can reduce the weight of your food to compensate for that wonderful chunk of aluminum in your pack. Ultralight backpacking cookware and canister stoves have their place, but on a canoe trip where an extra pound here or there isn't the end of the world, it sure is nice to leave the instant oatmeal on the store shelf and make some 'real' food in a Dutch oven over a fire instead! - John
]]>
The right way carries the load on your hips so you can use the big muscles of your lower body. The wrong way carries the load on your shoulders and puts unnecessary pressure on your spine, which causes a host of issues you want to avoid.
When you're fitting a pack, first make sure the harness is adjusted to fit your torso length. You may need to move the shoulder straps up or down - any reputable pack brand will have this adjustability.
Once you do this you won't need to adjust it again. Every time you put on your pack, simply follow the four steps below - in order - and you'll be carrying your load correctly.
First, loosen all the straps on your pack. Then find the bony crest of your hip bones. You want most of the weight you're carrying to sit on these bones. Position the hip belt over your hip bones and tighten the straps. You'll want them quite tight.
Next pull the shoulder straps down and back until they sit comfortably flush to your body. They shouldn't be as tight as to lift much weight off your hips, just take the slack out.
Tighten the load adjustment straps gently to pull the load closer to your body so it's easier to carry. Again, just snug. If they pull your shoulder straps up off your shoulders they are too tight. You want the curve of your shoulder straps to contact you all across the top of your shoulders.
Finally, make sure the sternum strap is positioned correctly: an inch or two below your collarbone. Snug it up to pull the shoulder straps slightly into a comfortable position. Not too much! You don't want to distort your shoulder straps or you'll get pressure points. We see lots of hikers with their sternum straps pulled way too tight.
You are now good to go. You should feel most of the weight on your hips and the first few steps might feel a little off balanced. You'll get used to it.
As you hike, you're going to get sore. Experienced backpackers will micro-adjust their straps many times during a day to shift how the weight is carried. If your hips get sore loosen your hip belt a little and tighten up some more load onto the shoulder straps for a short while. Play with these adjustments to see what gives you relief.
When you take your backpack off (and do this every time you stop, to give your body a break) simply go backwards through the steps to loosen everything.
Happy hiking!
]]>Duration: 2-3 days
Distance: ~50km
When to go: You can paddle the Waterhen anytime it's open, but make sure to check water levels with the Park before you commit. Levels can get too low to make the trip worthwhile.
Access: Put in at the bridge north of Goodsoil, just east of Lac des Îsles. If you want to add another half-day of paddling you can put in at the boat launch at Murray Doell Campground on Lac des Isles, then paddle east to the end of the lake and the entrance to the Waterhen.
Take-out is the Dorintosh bridge on Highway 4, although you can continue this trip to the Beaver River.
Description: This trip is about the perfect length and accessibility for a long weekend. Drive up to the Park on Friday night, camp at one of the established campgrounds there, then do your shuttle in the morning and get on the water before noon. Barring unforseen set-backs you should be at the take-out by mid-day Monday.
If you put in at the bridge north of Goodsoil you'll have less than a half kilometer of paddling before things get fun. There is a great run of fast water and Class I to II rapids that goes on for about 17km. These shouldn't require scouting from land if you are able to read water and current, but err on the safe side if you're not sure. Near the end of this section there is one rapid that has a bit of a drop; you might want to take a look before committing.
Be prepared to scratch up your boat. We've taken fiberglass and ultralight canoes down here and brought them home with new "story marks". This doesn't deter us, but it's something to be aware of, especially if you are newer to running rapids.
After this things calm down and the paddling is relaxing. This is a great time to look for wildlife such as migrating swans and waterfowl in the spring. The country is beautiful with fairly open grassy forests of deciduous and coniferous trees.
You'll see established campsites here and there on the north side as the Boreal Trail runs along the river in parts. These have rustic biffies and are a great place to camp, but there are abundant opportunities all along here for camping with great views of the river.
About 9 km or so from the take-out the river widens and the shores get a lot marshier. Make sure you camp before this. Here you can encounter sections of shallows that can beach your boat - read the current to see where the water is going.
The take-out is on RR (river right) just upstream of the bridge at Dorintosh.
Alternative routes: An alternate take-out (or extra spur if you want to explore) is to paddle up the Rusty Creek to Rusty Lake, where there is a small day-use area with road access. You'll need adequate water levels for this.
You can also extend this trip to Waterhen Lake. This section of the river can be confusing as it braids; make sure to research it before you go.
Happy paddling folks!
]]>Many dogs do well in canoes, especially if they are good car travelers. Like anything else it takes some training and acclimatization - don't expect them to know what to do right off the bat.
Start with small steps: being in the canoe on land, then floating, then short paddles. Whatever you use for regular training (treats, praise, etc) applies here as well. Teach them to wait for a command before getting into or out of a canoe. Sit, lie down, and stay are very useful commands.
Consider getting your pup a doggie PFD. Even if they are a strong swimmer the handle on the back gives you another measure of control so you can grab or lift your dog when necessary.
Kevin's dogs, Rumble and Cherchi, ready to go
As you would with children, wear your own PFD so you are able to help your dog in case of a capsize. They may end up under the canoe if you tip and can panic under there, so be prepared.
Again as you would with children, NEVER tie a dog to a canoe. This is a drowning risk.
Rumble at Little Stanley
First aid:
Along with a traditional first aid kit, there are a few extra items to bring along for your pup just in case. Baby socks or booties are great for sore or cracked pads, and vet wrap is very useful if you need to bind a leg.
We bring along Pedialyte oral rehydration powder in case of electrolyte issues - either dehydration or if your dog ingests so much water it throws off their electrolyte balance. Kevin's dog Cherchi once had a great time chasing waves along the shore and swallowed too much water; she became quite ill and he wasn't sure she'd make it. Edith's dog Islay had the same issue swallowing too much water while learning how to swim and leaked water uncontrollably for over an hour. This can be more dangerous than you'd think, especially in the wilderness far from help.
Jeff with his dog Bear in the boat, Montreal River
Tripping tips:
Edith portaging with her dog, Islay
Happy tripping!
]]>Water treatment can be confusing. What do you need, anyway? Here's how to choose the right system for your needs.
]]>First of all, here's a list of who might be contaminating your water:
Protozoa: these single-celled organisms may look innocent but can wreak havoc on your intestinal system. Giardia is a well known protozoan also known as "beaver fever". Cryptosporidium is another one and is difficult to treat for because the cyst has a highly protective outer shell. It can take from a couple of days to a few weeks for symptoms to manifest themselves after ingestion of a grumpy protozoa.
Viruses: tiny but fierce! They can slip through filters that have pore sizes bigger than .02 microns. Some viruses to avoid include Norwalk, Hepatitis A, and Rotovirus.
Bacteria: these guys are bigger and therefore the easiest to treat for. E coli and dysentary are some well known bacterial baddies.
Filters: Simply put, these push water through a filter commonly made of ceramic, hollow fiber tubes, or silica particles. Traditionally you pump the water manually through the filter, but there are now gravity filters which require a lot less work. There are also straw filters which pull the water through the filter as you suck it up through the straw. Filters will get rid of bacteria and protozoa, including cysts, but unless the pore size is .02 microns or less they will not remove viruses.
Purifiers: Usually in the form of chemicals, purifiers attack the nasties in the water. Iodine and chlorine dioxide are common purifiers and are sold in liquid and tablet form. Ultraviolet light can also purify water by disassembling the DNA of the goobies in it so they can't affect you. This method has been used in municipal water treatment systems for decades. Purifying your water with chemicals or UV light will get rid of all the nasty organisms in it, including viruses.
There are a lot of things to consider when choosing your system. Most importantly is whether you need to treat for viruses or not. If you stay in North America a filter is generally all you'll need, but if traveling overseas you will want something for viruses. If you want the cleanest water possible filter it first, then purify it with chemicals or UV light.
Other things to think about: will you be treating water for a group, or just yourself? Is weight an issue? Are you ok to wait for chemicals to work or do you need your water right away? Will there be a lot of particulate in your water that might inhibit purification and require a filtration step?
Here's a list of water treatment systems that we usually stock in the store, most of which we have personally used. We've listed the pros and cons to help you pick what's right for your needs.
Gravity filters
If you only get one treatment system, these are a great choice. Gravity does the work for you so you don't have to pump. They filter multiple litres of water in only a few minutes so are great for groups. They are heavier and bulkier than tablets or liquid chemicals but are on par with other filter systems.
Platypus Gravity Works - A great system that we've used many times, the Gravity Works has two bags (a "dirty" and a "clean") so you can store your clean water without having to dispense it directly into your containers. It's fast and simple to use and filters out protozoa and bacteria.
RapidPure Explorer Camp - This filter uses elecotrastic adhesion to attract everything in the water - including viruses - to its surface, where they stick. It is infused with anti-microbial silver and carbon to prevent bacterial growth in the filter. This filter has passed all the tests for protozoa, bacteria and virus removal. Because the filter doesn't depend on tiny pore sizes it works very quickly under very little pressure.
Pump filters
These have been around a long time and are proven effective at removing protozoa and bacteria. They also remove particulate and bad taste (especially if they have a carbon component); however they are heavier than chemicals and require you to actively pump the water through the filter, which can be tedious.
MSR Sweetwater - One of the lightest filters on the market and easy to pump, the Sweetwater has an activated carbon core for removing nasty tastes. The handle folds down so the entire unit fits into a pot set or can be easily tucked away in your gear. If the filter slows down and gets clogged, it's easy to clean in the field without tools. It isn't good for groups due to the pump rate. This model has been out for awhile and has been very positively reviewed online.
Chemical tablets or liquids
The two common chemicals used for water treatment are iodine and chlorine. There are three things that really make chemicals attractive: they are cheap, they are extremely compact and light weight, and they get rid of viruses as well as bacteria and protozoa. The downsides are that it's not a good idea to ingest chemicals over longer periods of time, they can add a swimming pool flavour to your water, and they require a wait time before your water is safe to drink. They also do nothing to remove particles or tastes out of your water.
Aquatabs - Each tablet dissolves into free available chlorine when added to water. This doesn't colour or flavour your water, unlike iodine or chlorine dioxide. They are safe and easy to use and have been used globally for about 15 years. After dissolving in your water you need to wait 30 minutes (room temperature) before you can drink it. If the water is dirty, filter it first (putting it through a coffee filter or t-shirt works in a pinch).
Pristine - This chlorine dioxide liquid comes in two bottles. You mix the liquids in a measured dose and wait 5 minutes until it turns bright yellow, then add to your water and wait about 15 minutes for the chemical to work. You may notice a subtle tinny flavour to the water.
Ultraviolet light
Using UV light to purify your water kills everything in it (viruses included) and renders it drinkable within a few minutes. There are no wait times, no chemicals, no added flavours, and no pumping. The cons are that these units are battery powered, so you have the limitations associated with that (weight, battery life, etc). They also don't filter your water (unless you get a pre-filter) so debris and bad tastes remain. These purifiers also do only a litre of water at a time so are better for personal use than groups.
SteriPen Classic or Ultra - Many of us have one of these and are really happy with it. All you do is press a button and stir the bulb around in your water until the light indicates it is safe. The bulb lasts up to 8000 activations and SteriPen will replace it after that if you register your product. The difference between these two models is the Ultra is lighter than the Classic and has a USB rechargeable internal battery, but the Classic comes with a pre-filter. This is also available separately.
Conclusion
As we already stated, it's generally accepted that if you stay in North America you probably only need to worry about bacteria and protozoa, which means pretty much any filter will do the job for you. If you travel overseas be sure to get something that targets viruses. Apart from that, it's merely a matter of choosing the features that are most important to you and narrowing things down from there.
]]>Canadian law requires you to carry certain safety items on board when operating pleasure crafts. Here's the most recent updated list from Transport Canada.
]]>Canadian law requires you to carry certain items on board when operating pleasure crafts such as canoes and kayaks, and it's good to know these before you set out on the water. Here are the most up to date regulations as of May 2023.
For human-powered boats under 6 metres in length you are required to have on board:
1. One lifejacket or PFD for each person on board. Check the tag on the inside of the jacket: it must be approved by Transport Canada (or Canadian Coast Guard or Fisheries and Oceans) to be legal.
2. One buoyant heaving line at least 15m long (that's almost 50'). This can be simply a section of floating rope, but it must be readily accessible and not used for any purpose except emergencies. Throw bags are recommended as they can be used more effectively in rescue situations.
3. One bailer or manual bilge pump. Bailers need to be made of plastic or metal and hold at least 3 cups, and have a minimum 9 cm wide opening. Pumps are easier to operate in kayaks which may not have enough room in the cockpit to bail properly. Note: sit-on-top kayaks (with no cockpit) and SUP's don't need bailers or pumps as they cannot hold enough water to capsize.
4. One sound signalling device. For most people this means a whistle that can operate underwater, such as a Fox 40 or similar. It's a good idea to attach this to your PFD; that way you'll never lose it.
5. Navigation lights if operating the boat after sunset, before sunrise or in restricted visibility conditions. Most people are off the water during these times, but if you are paddling in these conditions you need to be visible to other watercraft. For canoes, kayaks and SUP's a watertight flashlight is all you need for legal lights.
SUP and sit-on-top kayak paddlers: Most of the above rules apply to paddleboards and sit-on-top kayaks, however because your craft functions as a buoyant device in itself you do not need a bailer or pump. As well, if everyone on board is wearing a PFD that fits properly, all you need is a sound signaling device and a watertight flashlight if operating the boat in conditions with restricted visibility.
If you would like more detailed information on boating regulations, check out Transport Canada's Safe Boating Guide.
Happy paddling folks!
]]>
This is the right way:
Why?
It seems natural to hold the paddle as if it is a scoop. However the whole idea behind the angled blade of a bent shaft paddle is efficiency. Holding it correctly keeps the blade vertical in the water for most of the paddle stroke. A vertical blade means the force you put against the water will pull the canoe forward. A blade that is not vertical in the water will be pushing the water up or down, not back.
In the first picture, the blade looks vertical. But as Sarah goes through her stroke, the blade will be pushing the water upward, not back.
In the second picture there is a more positive angle on the blade at first but as the paddle reaches her hip through the stroke it will be vertical. The picture below is from Grey Owl Paddles and shows this concept:
]]>
As a small ski and paddle shop we were one of the lucky businesses in this pandemic. Individual outdoor activities boomed as programs and venues shut down and to top it off we got the best snow we've had in years. There was unprecedented demand for cross country skis and snowshoes which had us scrambling to keep up since the end of August.
Because many people were aware of product shortages they started buying earlier. We've seen this continue through to spring and sold two thirds of the canoes and kayaks we booked for the season before the ice was off the river. The buying cycle has shifted 4-6 months forward and we are placing orders almost a year and a half in advance now as we try to get in the queue to guarantee product.
This shift has also affected staffing. We normally have a slower period in October when a lot of "housekeeping" gets done but this was unexpectedly one of our busiest times this year and we were therefore short on staff.
For many consumers there are more funds available than usual with fewer travel opportunities and more program cancellations. Organizations such as schools and clubs are looking for ways to get their members active and involved and many have an opportunity to upgrade their equipment, creating increasing demand for large orders that need to be coordinated with our suppliers.
Things have been affected all the way back through the supply chains. Items manufactured with many components (such as bicycles) are most susceptible to delays. It was frustrating this past winter to be flush with boots and bindings but no skis - or vice versa - as we tried to coordinate the building of ski packages for our customers.
Some factories have endured temporary shut-downs and/or reduced worker capacity which has delayed production, and shipping remains a big issue. Most of the larger carrier companies retracted their timeline guarantees and due to many factors some products are hugely delayed. Items such as kayaks manufactured in Canada ship more quickly than similar ones made overseas, many of which are currently experiencing delays of 60 days or more. Some of the products we purchase from overseas have components made in Canada which means a lot of travel back and forth. The farther something has to go, the more it is potentially affected by delays.
Raw materials have gone up in price and there are some shortages. Fiberglass cloth is one material that is getting more difficult to source. Used for everything from boats to hot tubs this will have far-reaching ramifications, the least of which being higher prices on the floor.
Many small retailers had to reduce staff numbers when the pandemic hit. We were lucky to have a dedicated buyer which was essential to our ability to acquire product this year, some of which was only up for purchase a few hours before being snapped up. A large number of our cross country ski packages were acquired this way and without our buyer watching for these opportunities they would have been lost to us. Luckily this meant more customers on skis!
Speaking of our customers, many told us getting outside to ski or snowshoe was what helped them most through the pandemic restrictions. It was good for physical and mental health and enabled people to socialize in a safer way. Even as things move more towards "normal" we anticipate outdoor activities to remain important to people and demand to be high.
It is very difficult in these times to predict and plan for the future. What will the pandemic climate be like a year from now? Two years? Our business decisions are based on data trends but as these have gone through the window we can only gamble.
These effects will be felt for years. So let's continue to plan ahead, stay safe, and keep getting out there in the great outdoors.
]]>These boats are meant for recreational paddling, fishing, and day excursions and will generally be stable, short and maneuverable. Most can be paddled with a double blade to cut down on the need for steering strokes.
Generally on the shallow side (often 12-15" deep), these boats won't do well in big water or with a large load but they catch a lot less wind than a boat with more freeboard and won't blow around the lake as much. Another common feature is low, comfortable seats with back rests. Wider more stable models such as the Adirondack are perfect for fishing.
These canoes will have significantly more capacity than recreational solo boats. They'll be deeper (look for depths of 20" or more ideally) and many will have some flare at the bow to deflect bigger waves.
Some designs, like the Prospector and Caribou S, will have tumblehome - traditional rounded sides - which makes the canoe more stable as you load it. If you have a wood web or plank style seat you can also kneel on one side into the tumblehome bringing the ends of the boat up out of the water and shortening the keel line, making the canoe extremely maneuverable.
With long straight lines and very little rocker these canoes are built for efficiency. They'll track the straightest and require the least adjustments for steering, and the marathon (or "sit-and-switch") style of paddling works well with these sleek boats as they are usually narrow to accommodate a vertical stroke while seated.
The seat is often designed for sitting rather than kneeling, with a footbrace for more points of contact (and therefore control). Seats are mounted lower for stability, and some designs like the Clipper Solitude come with options for changing the seat height. Often these boats have an asymmetrical hull (shallower depth in the stern) to catch less wind.
There are some canoes that do well bridging the gap between solo and tandem: fun and small enough to handle alone, yet with seating and capacity for a team of paddlers. These may come as smaller tandem boats with a wood web or plank style bow seat that you can use for solo paddling. Paddling the boat backwards from the bow seat brings your weight closer to the middle of the canoe so it's easier to trim.
Or you might find a boat with a "solo seat" in the middle such as the Clipper Tripper S with its removable kneeling seat. These canoes are usually in the 15 -16' range for length which is enough for two people to trip in as long as they pack fairly light.
Length | Beam | Depth (B/C/S) | |
Wee Lassie 10'6 | 10'6 | 27/23.5" | 14.5/10/14.5" |
Wee Lassie 12'6 | 12'6 | 27.5/24" | 16/12/16" |
Esquif Adirondack | 12' | 31.5" | 13" |
Old Town Next | 13' | 29" | 11.5" |
Esquif Echo | 14' | 32/30" | 11.5" |
Clipper Prospector 14 | 14' | 29/29" | 21/15/21" |
Clipper Escape | 14'6 | 35/34" | 19/14/18" |
Clipper Caribou S | 15'3 | 27/30.6" | 20/14/20" |
Clipper Solitude | 15'6 | 28/30" | 16/13/14" |
Wenonah Prism | 16'6 | 26/30.75" | 19/12.5/17" |
Clipper Tripper S | 16'6 | 33/31.5" | 19/14/17" |
Duration: approximately 6 hours (1 or 2 days)
Distance: around 25-30km
When to go: spring or any time the water levels are higher in the park
Access: You'll be putting in at the campground on Namekus Lake, off Highway 263 (the scenic south access to the Park). There's a nice sandy beach and a parking lot there you can leave a vehicle in overnight.
The take-out is at Anglin Lake, wherever works for you - although if you are leaving a vehicle overnight we suggest the launch area in Jacobsen Bay (by Land of the Loon Resort).
Description: This trip tests the bow paddler. It's full of twists and turns which requires some solid draws to get the front of the boat around corners. If you don't have a strong paddler up front give yourself some extra time to complete the trip.
Paddle across Namekus lake to where it flows out into a small stream at the south end of the lake. The first bit will seem full as there is a beaver dam holding back the water. It takes about 2 hours to get from your put-in point to the camp spot at Trappers Lake, and you may encounter a few obstructions (like trees) but that's all part of the adventure. At lower water levels there may be a section or two of swift water. Watch for otter activity here, you might get lucky.
If you're camping overnight, there's the old campground (no longer maintained) on the south shore of the lake, NE up the shore from where the creek empties south again towards Anglin.
It will take you about 4 hours to paddle the next portion of the creek to the mouth at Anglin Lake. This is marshland, so fewer trees to worry about and lots of marsh flora and fauna. Keep in mind there are only about 2 places you can get out of the boat along this section, so take your snack break when you see the opportunity. There is a beaver dam to lift over at one point but hey, that's a chance to stretch your legs.
Not far from the end of the creek you'll pass an enormous beaver lodge. This mammoth structure is visible by sattelite on Googe Maps! Don't go poking your head in it, we aren't sure we want to meet whoever lives in there.
Once you reach Anglin Lake you have the option of taking a side trip up Christie Bay to the old Scout camp there. It's on the south shore just past the narrows and there is a plaque there dedicated to Charles Roy Christie, known as the "Grand Old Man of Forestry" in the first half of the 20th century, and his wife Rachel Stephenson Christie, a well respected leader in the deaf community at the time.
Enjoy your trip!
- the Eb's family
]]>First, take all the gear and loose stuff out of the boat. Any paddles/ropes/bags that remain clipped or strapped in to the boat will affect the balance and potentially make it difficult to portage, so be aware of this. Yokes are positioned so that a canoe will be perfectly balanced and it doesn't take much to throw that off.
Stand beside the canoe nearer the stern (back end). Reach for the far gunwale with the hand closest to the bow (front end) of the boat. The other hand can grip the close gunwale or you can try sliding it under the hull of the boat to help flip it.
Lift the canoe so it rests on your thigh. Your leg will be the power and drive behind the lift.
Rock the canoe a few times and then flip it over your head, pivoting on the bow (which should stay on the ground). Use the power of your leg to help boost the canoe up. Commit to this movement. It should be quick and fluid; it is technique, not strength that gets the boat over your head.
Steady yourself and the boat, then "walk" your way up the canoe until you can get your head under the yoke. Slowly help the bow lift until the canoe is balanced on your shoulders.
To get the canoe down at the other end of the portage, simply reverse the steps. You can try putting the stern down instead of the bow to see if this is easier for you - either works.
]]>
Non-inflatable personal flotation devices are now made with much safer and stabler materials than Kapok (a vegetable fiber found in tropical tree pods). However they also degrade over time and lose their buoyancy. So how do you know when to replace them?
We called up Steve Wagner at Salus Marine Wear to see what he had to say about this. Salus is a Canadian PFD manufacturing company and Steve knows his stuff.
Steve mentions that obvious damage like rips and cuts should be addressed, of course. But he says there are some things that most people don't know that affect the life of your PFD.
Different water bodies have different pH levels and algae populations, both of which affect how easily mold and mildew grow on your PFD. Some lakes are very clean and you'll never have a problem; some have conditions that make fabrics more susceptible to mold and mildew. Steve recommends rinsing your PFD with clean water after using it and laying it out in the sun to dry. Although UV exposure will fade colours, it is a natural bleaching agent that kills organics like algae and mold. Keep your PFD clean with an occasional gentle soap and water wash, and always store it in a dry, aerated space.
The foam inside a PFD is a closed cell foam, so it doesn't absorb water. It's a stable material that will last a long time if cared for properly. If you kneel on it or place it under a boat for cushioning, the foam will compress and some of the air bubbles inside may break. Over time buoyancy will be reduced. This can also occur in high pressure areas - parts of your PFD that fit tighter. This is why older PFD's are often more comfortable, Steve explains; the foam has compressed in those pressure areas to conform to your body. This is ok up to a point, but if you notice the outer fabric starting to hang a little loose it means a lot of compression has occurred and you should test the buoyancy of your PFD.
This is easy. Put your PFD on, jump in the water, and tilt your head back. If your chin stays out of the water it's good. If your mouth is underwater, your PFD does not have sufficient buoyancy.
Steve stresses that although PFD's don't expire it's a good idea to check them at the beginning of each season to make sure they are in good shape. Keep in mind that a repair will void PFD's approval by Transport Canada. If you keep it clean, store it dry and use it appropriately, a good PFD should last you 10 years or more.
]]>With the growing global concerns around COVID-19 (Coronavirus), we want you to know that the health and safety of our employees and customers is our top priority, and we are following the advice of the Canadian public health authorities at all times.
To date, the Public Health Agency of Canada has assessed the current COVID-19 public health risk associated with coronavirus as low, and with your safety in mind, we are closely monitoring their assessments for developments.
Our current health and safety measure include:
Protecting each other
If you are feeling unwell, please refrain from visiting our store. We have asked our staff to do the same.
Online shopping
As an option to in-store shopping, Eb’s Source for Adventure offers online shopping and shipping to your door, for your convenience, on this website.
As mentioned previously, we will continue to monitor this situation closely and provide ongoing updates as needed. We also encourage you to stay up-to-date through the Canada’s Public Health website.
Thank you,
Kevin Robinson
Owner, Eb’s Source for Adventure
]]>We are by no means a testing facility but we do ski a lot. We've been training, racing and coaching most of our lives and have a pretty good idea of what feels good on a ski and what doesn't. As stated in the earlier post, we were very curious about liquid glide waxes when they came out and for two years we've been using them extensively.
The take-away? Liquid glide waxes are really good. We love them. Not only are they convenient and easy to apply, we believe they may be superior to melted wax as far as base penetration into the ski, as the wax is suspended in a solvent.
A couple of us have been using only liquid glide waxes for training and racing both short and long distances, and our race times have not been affected negatively at all. When tested against other skis our glide is often superior. Again, we are not performing proper tests, but when you glide farther than other skiers more times than not, that's a good thing.
One of the biggest questions has been the durability of liquid glides vs ironed-in hot wax. There are many skiers who maintain that a melted wax will have greater durability than liquid, hands down. We however are unconvinced. So far we have had good results with LF, HF and UF liquid glide at events up to 55 km. It is important to go through all steps for maximum durability: glide zone clean, liquid base wax, then liquid glide wax - making sure to let the products fully dry, cork them in, and then brushing.
Vauhti maintains that their liquid glide waxes last at least 40 km. They research and test their products over the long-term at the University of Eastern Finland using World Cup service teams, so they know their stuff. They have developed a number of LDR (long distance racing) products that have extremely high dirt resistance and greater durability than the regular fluoro lines. If you are putting top coats on your bases, these LDR liquids will extend their durability significantly as well.
One of the reasons we like Vauhti is that their waxes suit our snow well. Saskatchewan, like much of Finland, has cold dry snow. We don't have experience (yet) with durability or performance of liquid glide waxes in man-made and wet snow conditions since we almost never encounter these, but feedback from the ski world (online and personal) is positive.
If you are thinking of giving the iron a rest, we recommend getting your bases stone ground before giving liquid glides a go. Even World Cup level wax technicians have been known to seal bases - it's a risk every time heat is applied to a ski base, and especially when applying hard, cold weather wax (as is often necessary here in Saskatchewan). Liquid glide waxes work best on fresh bases.
Or, like many local skiers, keep hot-waxing your skis but experiment in between hot waxes with the liquid glide products. Do a little "non-professional" testing yourself and see if you like what you feel on the ski.
As always, we welcome feedback. Let us know how it goes!
]]>Correctly sized poles is important because it affects your technique. Sizing depends on the height of the skier, the discipline (skate or classic), the terrain, and the experience of the skier. Personal preference plays a role and there is some wiggle room here; however there are negative effects if you go too short or too long.
Proper ski technique for both skate and classic involves flexion at the ankles, knees and hips so that your weight is slightly forward over the ski. Ideally you want to move your weight over your poles as you ski and get the maximum push out of them.
If your poles are too short you will be missing some range of motion and won't get the maximum push out of them. You'll really notice this double poling at higher speeds.
If your poles are too long the change in the lever effect will restrict your economy of movement. It is more difficult to get your weight over the poles and often results in too upright a stance. We see a lot of skiers - especially skate skiers - with poles that are too long.
For a rough guide to pole length, stand in footwear (your ski boots, ideally) on a flat surface. Put the pole tip on the floor. Where the strap comes out of the pole is where the height of the pole is measured.
According to the 2020 International Ski Federation (FIS) rules (which we use both nationally and in Saskatchewan), pole length allowances are as follows:
Again, body height is measured with ski boots on from a flat surface to the top of the uncovered head. Pole length is measured from bottom of pole to the highest attachment of the strap.
For example: if you are 178 cm tall (5'10) with your ski boots on, your maximum classic pole length would be 148 cm (rounding to the nearest cm is legit). Remember, this is the maximum allowed height for classic poles, so you can go shorter. Many racers are most comfortable with pole lengths significantly less than the 83% rule.
]]>
Many of us have been cross country skiing for decades in and outside of Saskatchewan and like many of you we get out in some pretty nasty cold. Even though there are cut-off temperatures for cancelling races we have raced many times in -25C and colder.
We have never heard of anyone actually freezing their lungs.
Doing some rudimentary online research, it looks like this is just not a thing. There is so much blood continuously moving through the lung tissue which seems to keep the tissue from freezing.
That said, breathing the extremely dry air that we get in the cold can be quite irritating to the lungs. We know cross country ski athletes who experience coughing and other asthma-like symptoms after racing in cold conditions; this is a temporary narrowing of the airways known as "exercise induced bronchoconstriction".
The takeaway? You won't freeze your lungs working out in the cold, but to help prevent irritation we recommend breathing through your nose and covering your face if possible. A Buff or balaclava pulled up will not only warm the air you breathe, it will also hydrate it.
For skiers who wear glasses (also recommended, as the snow reflects so much UV light up into the eyes) fogging is an issue when wearing a Buff or neck tube. If you have a solution to this we would love to hear it! The best we've found is to wear a flip-up visor with a lot of space between your eyes and the lens, such as the Bliz Proflip.
As for neck tubes, we recommend the Buff Thermonet. We've found it to be the easiest Buff to breathe through, and it's made of Primaloft fibers making it 4 times warmer than regular Buffs. However we've also found the cheap polyester neck tubes you can get for 5 bucks are not bad either!
]]>
We've brought in various brands of heated socks over the years, but this year due to popular demand we brought in the highly rated Lenz 4.0 heated socks. These came recommended to us by trusted customers. Alison, who spends a lot of time coaching nordic skiers, decided to give the socks a try.
Out of the box you get one pair of knee-high socks, two lithium rcB 1200 rechargeable packs, a global USB charger (100-240V), a USB charging cable with indicator, and a storage bag. The socks have heating elements along the top of the foot and surrounding the toe box.
The socks themselves seem well made and are stretchy and comfortable. Alison says they feel the same as a normal sock - she can't feel the wires inside, and her feet fit normally inside her ski boots. The battery pack which sits on the outside of the upper calf is slightly bulky but it doesn't bother her, and her pants fit over top just fine.
The battery pack has 3 levels of heat that you adjust by pushing a button. For better control you can download the Lenz app for no charge. This allows you to control the heat for each sock independently (or together) on a scale of 1-9. You can even set intervals for them to be heating and not heating.
The battery will last a whole day on low-medium. The heat seems to kick in pretty quickly too, Alison says. The batteries charge in only a couple of hours.
Probably the biggest con would be washing the socks, according to Alison. You'll want to wear them all the time outdoors so that means a lot of washing (unless you get a second pair). They need to be hand washed ideally, and hung or laid out to dry. The only other thing she noticed was not really a con, but just strange.. you can't turn the battery pack off. You simply put it into "standby" mode and a light will blink for 12 hours before it turns off. This is not a defect, it is in the manual; it just seems a little odd.
Pros: they don't feel like you're wearing socks with wires in them. Having the app allows you to control the socks with your phone which is really handy, and the battery life is good. The biggest pro of course is having warm feet in the winter, something that seems a dream for many of us! Alison now wants heated gloves, vest, and anything else available.
Yes!
]]>